Wednesday, December 21, 2011

Kitchen Makeover: Before & After

Hello Lovelies!

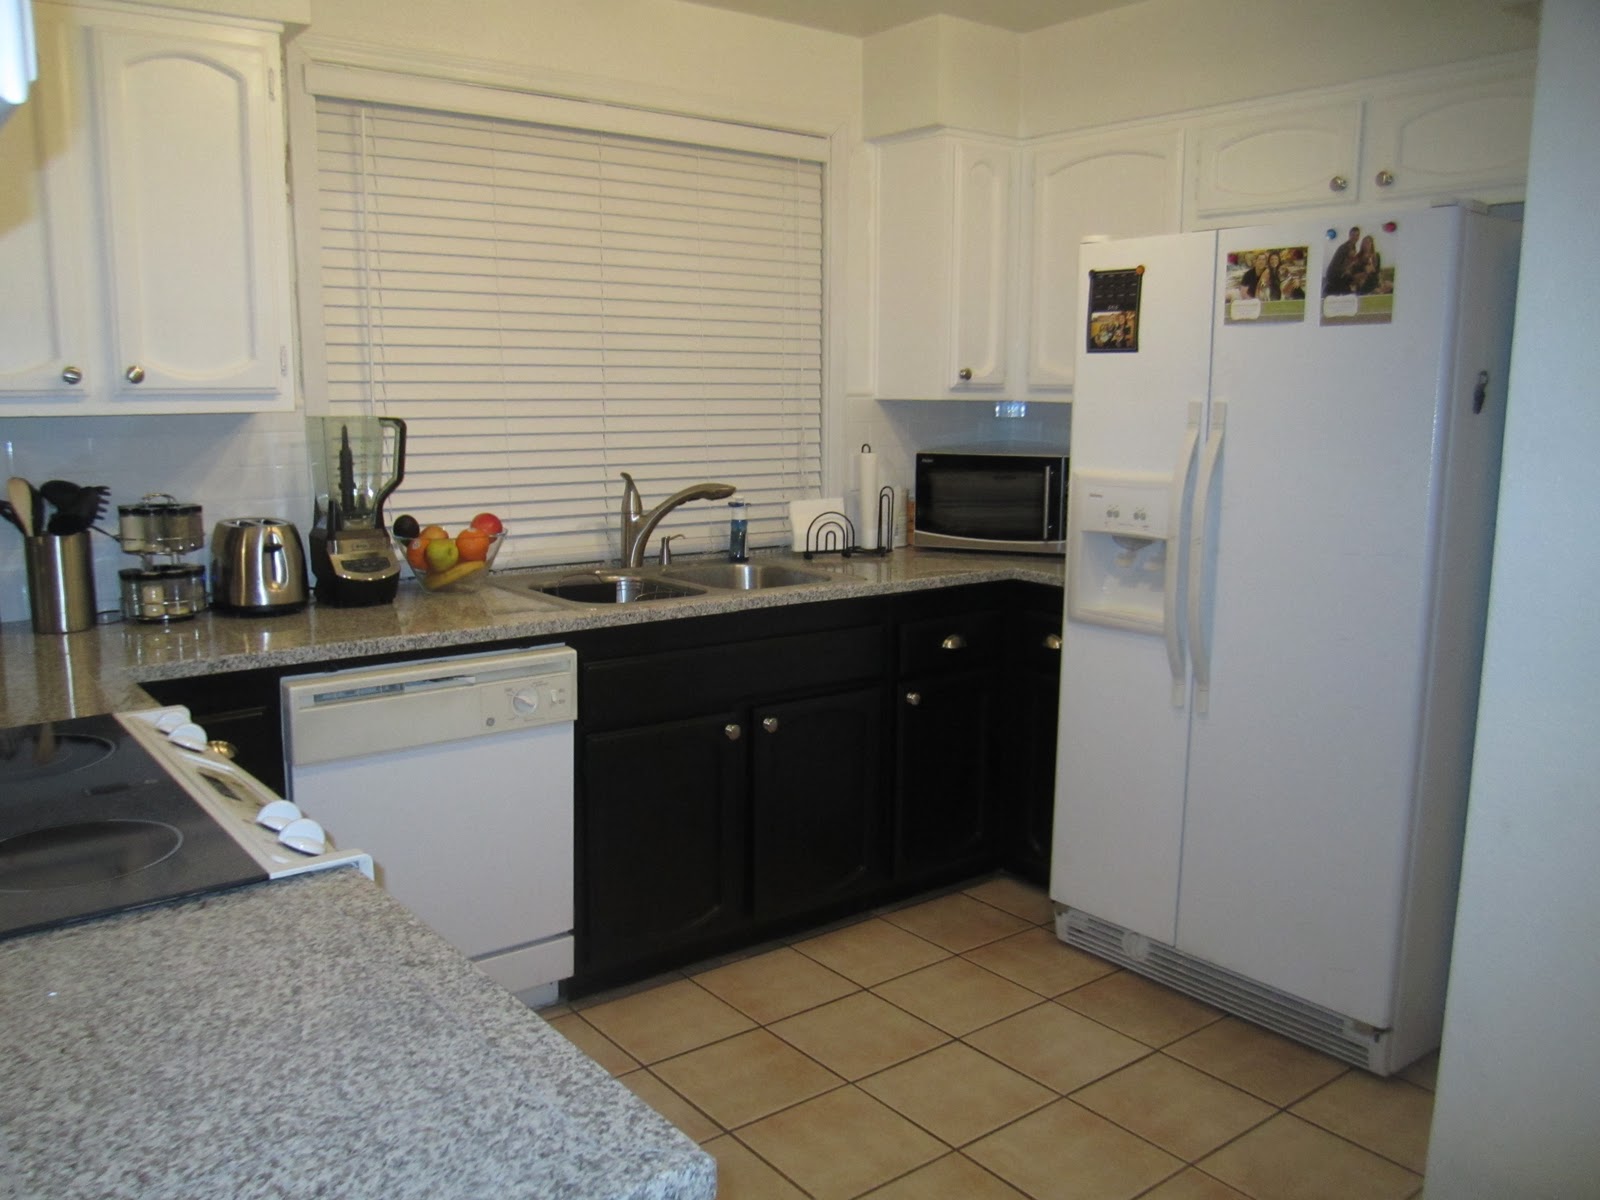
The kitchen cabinets and countertops are complete and I FINALLY have some before and after pictures to show you all! 
Before:
After: (Notice the stove & extended bar!)
Before:
After: (Notice the stove, subway tile backsplash, countertops, and hardware)
Before:
After:
Although we only have a few little things left to do to make our kitchen absolutely complete, we are going to take a break for the rest of the year and get back to work on the final touches in 2012. The only things really left on the list are to paint the walls a light gray color, get new kitchen bar stools, new lighting fixtures above the stove, and add some window treatments. Since Matt and I both love our instant gratification, we typically rush into everything and get the first thing we see. Since it's the start of a new year, we decided that a good New Years resolution will be to take our time in selecting the anything new we buy. 

And, just because I can't get enough of it, here are some more after pictures:

Hope you enjoy the pictures! Doesn't it look like a whole new kitchen?!?! We it!

Have a lovely day!
 
Natalie

Thursday, December 15, 2011

Kitchen Makeover Part 4: Hinges, Knobs, & Pulls

I did a ton of research for the EXACT kitchen that I wanted. I looked at picture after picture of all different types of kitchens. I even printed out pictures of kitchens that I LOVED and hung them on my fridge so that I could stare at them every day to make sure that I wouldn’t get sick of them. Obviously, I had to compromise a little since we weren’t knocking out any walls or actually getting new cabinets. But, I must say, with all the hard work we put in and the updates we made really gave us the feel of having a new kitchen.

The hardware we picked really helped add our own personal style to our updated kitchen as well. We got the inspiration just by looking at pictures of other blogs and on Pinterest. Then, we went to Home Depot and looked at all the hardware they had in their store. We were shocked at how much hinges and hardware were, so we decided to buy everything online because we knew we could definitely find a better deal elsewhere. 

I think we were the most surprised by how much the hinges were. Our hinges were super old and gross, so we definitely needed to buy some new ones. Since we were doing black and white, we needed white hinges for the top and black hinges for the bottom. We had to buy a total of 21 pairs and at Home Depot these babies were about $2.80 a pair. We ended up finding our new hinges on eBay at $1.58 a pair, which included shipping and tax! We basically saved 40% by getting these online! 

The hardware we found at Home Depot was SUPER crazy expensive. The pulls we wanted were $6.29 a piece at Home Depot. This sounds fine, but when you have to multiply it by 5 drawers, it came out to be more than I thought and it seems kind of silly to spend over $31 on just the pulls. After searching around, we ended up finding very similar (if not better) pulls on Amazon for only $2.19 a pop. We also had to get the knobs for all 20 cabinet doors. The matching knobs at Home Depot were a whopping $2.99 a piece, but we lucked out because the seller we bought the pulls from also sold matching knobs for only $1.89 a piece.

At the end of the day, a little research went a long way!


Home Depot Online
Hinges: $58.80 $33.18
Pulls: $31.45 $10.95
Knobs: $59.80 $37.80
Totals: $150.05 $81.93

Total savings for hinges and hardware was $68.12. Not too bad, if I must say so myself!

After we put these bad boys on, the hard work will be over! I can't wait to show you guys the finished product!

Have a lovely day!
 
Natalie

Sunday, December 11, 2011

Kitchen Makeover Part 3: Bottom Cabinets

After the countertops were installed, we were antsy to get the entire project finished! It was also nice to know that the bottom cabinets would only be about half as much work as the upper cabinets were. We have about half as many cabinets on the bottom and the process of going dark to darker is much easier than going dark to white.

Unlike the process we did for the upper cabinets, I would suggest this process for anyone wanting to redo their cabinets. It is pretty much the standard way, but it's not as bad as people make it out to be. My suggestion is to take a few days when you have absolutely nothing else to do, put some good jams on, and before you know it, you will have newly painted cabinets :).


Step 1: We removed all of the cabinet doors from the top half of our cabinets. (We had to order new hinges, but if you are keeping the same hinges, be sure to organize them in individual baggies so you know which hinges go on each cabinet door. This also goes for the hardware).

Step 2: If your cabinets are already painted, lightly sand the areas that are rough or areas that have any paint peeling off of them. If your cabinets have never previously been painted, you may want to lightly sand all areas of the cabinets. 

Step 3: Wiped down all of the doors and cabinet frame with soap and warm water. 

Step 4: Dried all doors and frame with a lint free white t-shirt.

Step 5: Applied deglosser. We purchased Klean-Strip Deglosser at Home Depot. This deglosser is pretty cheap. An entire bottle only costs about $5 or $6. Since the chemicals in the deglossing liquid are pretty strong, we wore latex gloves throughout this whole process. We applied a generous amount of the liquid on a green scrubby brillo pad and scrubbed each door and the frame of the cabinets thoroughly. (Again...the deglosser will NOT take the paint off. It will only remove the polyurethane.
Even if your cabinets to not have polyurethane on them already, it is still a good idea to use this anyway as it acts as an adhesive to the first coat of paint).


Step 6: After the deglosser was applied, we had to do one final wipe down with a lint free white t-shirt. (Used another one of Matt's white t-shirts...They sell these at Home Depot, but these shirts just happen to be a part of Matt's "uniform").

Step 7: We set up an 'assembly line' in our garage by laying all of the cabinet doors out on two long painter plastic sheet thingies (again...our terminology).


Step 8: We started by painting the back side of the cabinet doors with  KILZ2 Latex Primer. We used foam brushes (we discovered that the variety size packs at Ace Hardware are the best price by far!!) Once we applied the primer on the doors, we did the drawers and the actual cabinet frame as well.
Step 9: Once the primer dried, I flipped the cabinets over and applied the primer to the front of the cabinet doors.

Step 10: After the primer was applied and fully dry, we cracked open the Black paint. I swear, Matt thinks I am crazy, because I kept looking at the paint and it looked Grey to me. (I even made him come with me to Home Depot at 8 AM on a Saturday to see if the paint department could add more black tint to it. Well, needless to say, Matt's notion of me being "crazy" was confirmed. The paint was so black, it was impossible for them to add anymore to the can.) So, we came back and I started on the first coat of black. The black paint we used did not have a name per say, but it was 4.5 oz of straight black tint in a quart of Behr Premium Plus Deep Base Interior Eggshell Enamel. Like the process for the primer, I applied the first coat
to the back of the cabinet doors, then to the drawers, and the cabinet frame.


Step 11: Once the first coat of black paint dried, I applied the second coat in the same manner.


Step 12: Once the second coat of black paint dried, we applied a thin layer of 'Varathane Satin Polyurethane' to ALL areas of the cabinets and frame. Let Dry.
Step 13:  Hung the bottom cabinet doors back onto the bottom cabinet frame. DONE with Kitchen Makeover Step 3! 
 
Now, all we have to do is attach the hardware to the bottom cabinets and we will be ALMOST done!! We can see the light at the end of the tunnel!!!
 
Pictures and information on where we bought the hardware coming soon...


Have a lovely day!
 
Natalie