Monday, October 31, 2011

Rocks, Paper, Scissors - Happy Halloween

We had our annual Halloween party at work this year, which included a pumpkin carving contest, fun Halloween treats, and of course, getting dressed up in our Halloween costumes.  This year a few coworkers and I decided that we wanted to do something different and be a little bit more creative than we usually are with our Halloween costumes. Between the three of us, we came up with a really funny and work-appropriate idea.


 ROCK PAPER SCISSORS!


We dressed up as Rock, Paper, Scissors! All in all, the costumes turned out great! They were extremely inexpensive as well! The scissors were made with poster board, red paint for the handles, metallic spray paint for the blades, and black ribbon for suspenders. The paper costume was made with two giant pieces of poster board, markers, and ribbon for suspenders. The rock was made with a small moving box, tissue paper, and a thick metallic ribbon for suspenders. We all wore black underneath our costumes, and voila!


What kind of creative costumes did you decide on this year? 


Happy Halloween!


Natalie
Tuesday, October 25, 2011

DIY Velvet Pumpkins


Hi Friends!

I would consider this past weekend to be both pleasant and productive! I was able to hike Squaw Peak (or I guess it's Piestewa Peak now) twice, spend some quality time with the most amazing woman in the world, my grandma (a.k.a. Nannie), and just catch up on life!

Although I kept pretty busy this weekend, I was still determined to squeeze in at least one quick and easy project. I originally got the idea for this project when I stumbled across a tutorial for 5-Minute Pumpkins. Since I didn't have much time, I decided this would be the perfect simple project for my busy weekend!

This is what we are making:
  •  Things you will need for this project:
    • Velvet fabric in fall colors
    • Polyster Fiberfill
    • Beans
    • Pumpkin Stems (You don't actually need the pumpkins in the picture, just the stems. I took the picture before my husband came home to cut the stems off. Those suckers are hard to cut off!)
    • Rubberbands
    • Sewing machine

Step 1: Cut fabric into square. For medium sized pumpkins, each side should be about 2 feet in length. Fold fabric in half so that the velvet material is on the inside. Sew the fabric closed on one side.

Step 2: Insert pumpkin stem into one end of the opening in fabric. Tie rubberband around fabric and base of pumpkin stem. Get this as far as you can to the base of the stem and make sure the rubberband secures all openings in that end of the fabric. 

Step 3: Hold base of stem and pull fabric over so that velvet part and top of stem is exposed.

Step 4: Stuff other end of fabric with polyester fiberfill.

Step 5: Once stuffing is pushed all the way to the top, pour a handful of beans on top. This will add weight to the bottom of the pumpkin to help the pumpkin sit nicely when completed.

Step 6: Push stuffing all the way up and tie end with rubberband.

Step 7: Cut remaining fabric so there is a tiny bunny tail at the end (or at least that is what I call it).

Step 8: Tuck "bunny tail" in as far as you can, turn pumpkin upside down, and you've got your velvet pumpkins!

These velvet pumpkins are a great addition to the fall decor in our home. These were so fast and easy that I may replace the orange pumpkins with jeweled colored pumpkins once Halloween is over. 

Bibbidi-Bobbidi-Boo!
 
Natalie

Friday, October 21, 2011

Surprise!! New Door Hardware!!


So, looks like someone guessed it right!! The surprise package we received was full of new door hardware! I know it sounds lame, like who gets this excited about door handles? Well, wait till I show you the pictures of the door handles we had for the last 5 years.

This is what ALL of our door handles looked like. Everything about these are WRONG!! They are bronze, chipped, paint splattered, crooked, and that Aztec looking design is just creepy.

This is what the new handles look like:

Before: Seriously creepy

After: Subtle but HUGE difference!


Yes, that's right my friends, we have lived in this house for 5 years and I am just updating these now! WHY?!?!? Well, I hope that's what you are asking yourself. My hubs and I moved into this house thinking we would only be here for about a year...2 years max! Well, it's 5 years later and we are still here and will most likely be here for a little while longer. We debated moving for a while, did the whole home searching thing, and decided to stay in Chandler until the time is right! I am a true believer that all things happen for a reason, so when the time is right, it will happen. In the meantime, I decided that I want to LOVE the house I live in, so why not show it some TLC!

I love, love, love the round crystal door knobs and definitely would have put those on all of the doors, but since we are going to move eventually, we decided to hold off on those until we move into our next home. Even though these handles are just the basic brushed nickel levers, they look nice and updated and are a heck of a lot better than what we had before! We had to replace a total of 9 door handles, so we went to Home Depot to scope out the handles we wanted and then did an online search for something a little less expensive. We found these handles on eBay and for all 9 sets we spent a total of $130. That comes out to about $14 a set! Super Cheap!

We have done some major projects recently like refinishing the cabinets in our master bathroom, guest bathroom, and hall linen closet (hopefully I can dig up some before pictures so you can see the transformation) We also have some major projects in the pipeline that we are getting ready to tackle (i.e. kitchen and dreaded popcorn ceilings). So, I figure in the meantime, easy updates like this will keep us motivated and on track to turning our house into a HOME we LOVE!

  Bye Bye Creepy Door Handles!

Have a lovely day!
 
Natalie

Wednesday, October 19, 2011

Surprise Package!


I think it's fun to get a little something in the mail once and a while. Well, Matt and I ordered something online for our home and just got it in the mail! Here it is! What do you think it is??

I honestly cannot believe we are just updating these in our home now. It's crazy how one little update makes such a deference!


Have a lovely day!

Natalie

Monday, October 17, 2011

Blue Jean Baby


I don't know about you, but for me, it usually seems absolutely impossible to find those perfect pair of jeans. They either don't fit right or they are wwwayyy too expensive for me to even consider buying. I get lucky if I find one good pair and then, when I do find that pair, I tend to fall in love with them and wear them until they are basically falling apart!

Well, let me tell you, I have hit the jean jackpot this year!! Even though it's not even really "jean" weather in this hellish great state of Arizona, I have already found not 1, not 2, not 3...but 6 pairs of those PERFECT jeans!! That's right people, 6 pairs of perfect jeans, and I think I have finally found the trick to hitting the jean jackpot, so let me break it down for ya.

Since the good jeans are usually way out of my price range, I have been going to places like Nordstrom Rack and Nordstrom Last Chance because they sell great name brands and I know the price range will most likely be within my budget.The trick to finding that perfect pair is to find the jeans cheap and then get them altered to fit your body perfectly.

At Nordstrom Rack everything is usually discounted heavily from their original price. Sometimes some pieces  can still be a bit pricey, so I would really prefer that they fit perfectly for me to even consider. Then, there is Last Chance. You definitely have to be prepared to search, dig, and rush through the racks frantically to make sure the girl next to you won't snag the perfect pair before you, but when it's all said and done it's totally worth it! 


From top-left to bottom-right:
Rock & Republic - Costco - $40
7 For All Mankind - Nordstrom Last Chance - $15
Joe's Jeans - Nordstrom Rack - $80
Joe's Jeans - Nordstrom Last Chance - $30
Paige - Nordstrom Last Chance - $30
Paige - Nordstrom Last Chance - $15
Total Alterations Cost: $60
Grand Total = $270


All in all, I got six pairs of jeans for a total of $270. That is insane, considering it would typically cost that much for just two pairs. Good Luck searching for your perfect pair!!

Have a lovely day!

Natalie

Saturday, October 15, 2011

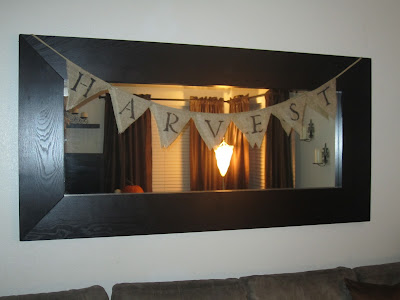
Harvest Burlap Banner


Arizona definitely has a hard time transitioning from summer into fall. It seems that we usually get a taste of cold-ish weather during the first week of October (and when I say "cold-ish" I mean anything under 90 degrees) and then we typically get a heat wave the second week for one last hoorah of hot weather.

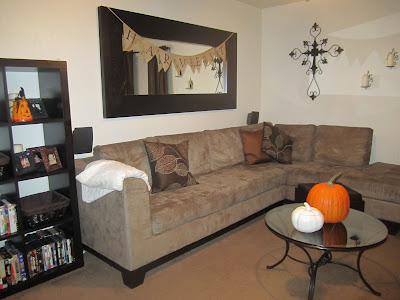
Well, I think it's safe to say (or at least I'm praying it is) that we are finally getting into the Arizona fall weather! I am usually one of those people that can't start decorating for the fall until it really feels like it, but this year I just couldn't wait around for it so I decided to make a burlap harvest banner to ring in the fall weather.

I first saw this burlap banner on the Wedding Bee and since I have already had my wedding, I thought it would be so cute to turn this into one of my fall projects. The project was super easy too!

For the first part of the project, you will need:
Burlap
Stencils
Ruler
Magnum Sharpie Marker
Scissors
Triangle Template (I made mine from a piece of standard copy paper)

For the second part of the project, you will need:
A thick string or hemp
Glue Gun


Step 1:
Trace triangle template with permanent marker and ruler on burlap.


Step 2: Cut out triangles


Step 3: Lay stencil template over burlap flags and fill in with permanent marker.

Step 4:After all flags are completed, glue flag onto banner string.


Step 5: Hang burlap banner in home as your fall decoration.


This project was SUPER easy and I hope you enjoy it!


Have a lovely day!


Natalie

Wednesday, October 12, 2011

Seashell Canvases


Have I mentioned that I get bored super easily? Well, I do! My mind travels at about 10,000 miles per minute and I need to be doing something constantly to keep my mind occupied.  So, in between some big projects that my husband and I are currently working on, I have been doing some simple projects to keep me busy along the way.

I got the inspiration for this project while on one of our vacations to Ixtapa, Mexico. Ixtapa definitely holds a special place in my heart because that is where my husband proposed to me and where we got married a few years later. The night we were married, we had dinner at the beautiful Villa de la Selva restaurant, which is built on a cliff overlooking the Pacific Ocean. The owners of this breathtaking restaurant also continually rotate art from both local and international artists, which only adds to the incredibly romantic ambiance Villa de la Selva has to offer.

One of the many nights we dined there, I fell in love with some of the pieces they had on their wall. While being seated, I attempted to take a picture because I was determined to make these for my house. So, my apologies for the blurriness...I'm allowed to be blurry...we were on vacation after all!


 Actual pieces on the wall at Villa de la Selva.

Step 1: Started out with some painted canvases I had no use for anymore.


 Step 2: Paint canvases with acrylic paint. For this project, I used Americana's Bittersweet Chocolate acrylic paint and sponge brushes from Michaels.

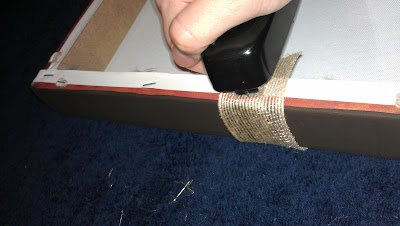
 Step 3: Take desired ribbon/netting/floral wrap and staple to back of canvas.

Step 4: Super Glue desired starfish, seashells, or any beach-like things you can find.


Step 5: Let glue dry and hang on wall.


And...Our finished beach-themed bathroom!


What do you think? Do you like it?


Have a lovely day!

Natalie

Monday, October 10, 2011

Mason Jar Lids

Apparently I seem to have a problem leaving any store empty handed, as I have somehow accumulated a ton of mason jars from my frequent visits to Goodwill lately. I had no real plan for them, I just felt like I needed to buy them whenever I saw them, which happened to be a lot!

We recently updated our bathroom cabinets by following the steps from one of our favorite blogs, The Epper's Adventures. I wish I had before pictures just to show you how insanely different our bathrooms look! They turned out fabulous! (For before and after pictures of the process, check out the Epper's Cabinet Face Lift).
 

So, after staring at my rather large collection, I decided to spray paint the lids and fill them with decor to match our new bathrooms.

Mason Jar Collection:

Step 1: Choose your color of spray paint, 
depending on the look you are going for.
Spray paint lids and let dry.


Step 2: Fill your newly spray painted mason jars with objects of your choice. 

Our guest bathroom is a beach theme, so we went with seashells. Our master bathroom is just a traditional bathroom with white and tan accents, so we went with a natural potpourri.

This lovely little project was super easy and I will have more pictures of our new bathroom for you soon!

Have a lovely day!

Natalie

Saturday, October 8, 2011

The Big Easy


I recently traveled to New Orleans for a quick little family vacation! Since this was my first time visiting the city, I honestly did not know what to expect. The only ideas I really had about the city were based off of stories from my friends that had been there before, most of which were for bachelorette parties, Mardi Gras, etc. I guess I was expecting it to be one giant party with naked people all over the place (don't get me wrong...there were definitely some drunk naked people and some overall weirdness, but that was primarily on Bourbon Street).

Well ya'll! New Orleans proved me wrong! The city was STUNNING! We totally lucked out with the weather too! It was definitely fun to see all the craziness on Bourbon, but NOLA had soooo much more to offer! Talk about inspiration people...this place had inspiration written all over the place! From the historic buildings and all of the amazing architecture, the enormous INSANELY BEAUTIFUL homes in the Garden District, and antique store after antique store on Royal Street...I could just go on and on my lovelies! Oh, and the food...Oh my sweet goodness, the food!!

Many of the places that we visited were suggested by a good friend of mine, Ashley, and my world class traveling sister-in-law, Lindsay. Ashley knows the city like the back of her hand because she actually studied at Tulane until 2005, when she was forced to evacuate because of Hurricane Katrina and Lindsay has been there many times. We combined the recommendations from both of them, which resulted in a nice blend of both the "touristy" spots and the local spots.

We visited Cafe Du Monde everyday. This place was established in 1862 and is open 24 hours a day. Even though their menu is simple, offering only beignets, cafe au lait, black coffee, and milk, it is PACKED no matter what time you go! Each order of beignets comes with 3, and all though I could've had 3 orders of 3 to myself, we were good and shared an order each time...I promise ;).


Yo Mama's on Bourbon Street. Ever heard of a peanut butter bacon burger? 
Sounds gross right? Well, it was AMAZING! 


The crew at Pat O'Brien's. This is where the Hurricane was invented.

Waiting for the Streetcar on St. Charles St. in the Garden District.
Look at those houses in the background. I could've spent hours walking around this area!

After Katrina, almost every house was searched and then tagged with spray paint to identify the results of the search. The residents of this home in the Garden District of NOLA decided to leave their markings as a remembrance of Katrina. This will be the most memorable experience I had in New Orleans, as I will never be able to understand the amount of destruction Katrina had on the city and the immense amount of hardship the residents had to go through. 

Top: Mahoney's Po-Boy Shop on Magazine Street.
Middle:  Fried Oyster Po-Boy...YUMMMM
Bottom: Root Beer Glazed Ham and Cheese Po-Boy

Top: The Saint Louis Cathedral by day. This is the oldest Catholic cathedral in continual use in the U.S.
Bottom: The cathedral looks like a fairytale dream at night! The charming cathedral located directly overlooking Jackson Square is surrounded by tarot card/palm readers at night. You may just want to have a reading when you're there...you never know what your secret gifts may be!

Top: Right outside Doors Uptown Pizza, located uptown, near Tulane University. This pizza joint was definitely off the beaten path and is a total Packers bar, complete with Packers paraphernalia and fans!
Middle: The ceilings and walls are lined with doors that were recovered from Hurricane Katrina.
Bottom: My sister-in-law, me, and my husband representing the Pack everywhere we go!

All in all, New Orleans was amazing. These pictures were just a glimpse of what the city has to offer. For any of you that have not had a chance to visit the city, I highly suggest you go!

Have a lovely day!

Natalie